
3D-Printed TPU Levelling Cups for the TwoTrees TTC450 Ultra
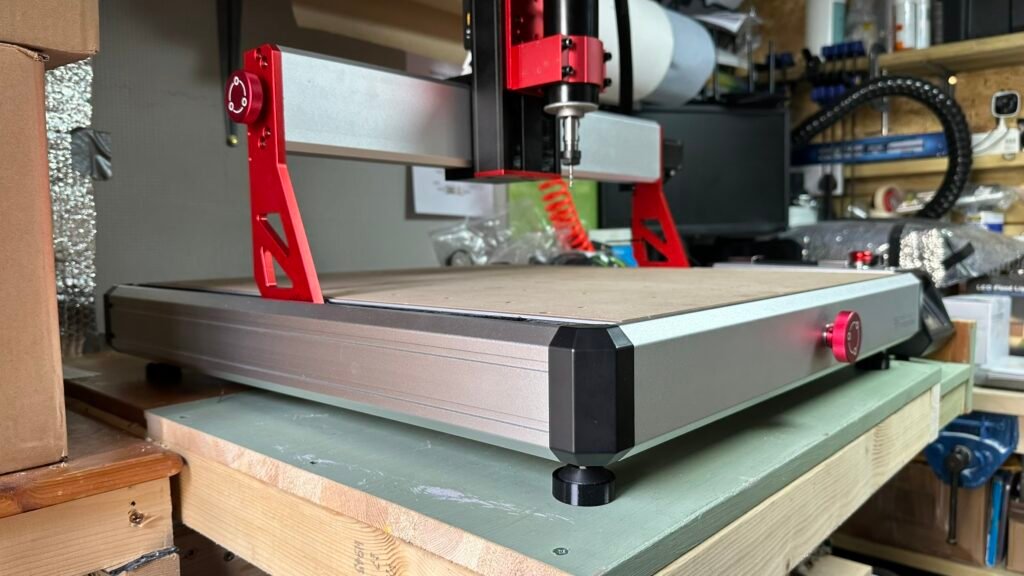
One of the small upgrades I designed for my TwoTrees TTC450 Ultra CNC mill is a set of TPU levelling cups and spacer discs for the machine feet.
This is a simple idea, but it solves a very practical problem. The TTC450 Ultra has adjustable feet, which can be wound in or out to level the machine. That works, but if one corner needs to be raised by several millimetres, the foot has to be wound out quite a long way. When that happens, the machine ends up sitting on a longer exposed threaded section, which does not feel as secure as it should.
I wanted a neater and more stable way to level the machine without relying on long, extended feet. So I designed these levelling cups, printed in TPU, with matching 1 mm spacer discs that can be added underneath each foot as required.
The model is available here:
TwoTrees TTC450 Ultra Foot Levelling Cups on MakerWorld
Why I Made Them
When setting up a CNC machine, getting the frame level and stable is important. It does not automatically make the machine more accurate in every situation, because the cutter follows the machine’s own axis geometry, but having the machine sitting level and solid on the bench makes setup easier and gives a better starting point.
The normal way to level the TTC450 Ultra is to adjust the feet. However, if the bench or surface is not perfectly flat, some of the feet may need to be wound out more than others. That can leave a long section of threaded stem exposed.
I did not like that arrangement because the machine foot then feels less supported. A long exposed threaded section can look untidy, feel slightly flexible, and may be more vulnerable to vibration or sideways movement.
The levelling cups avoid that problem. Instead of winding the machine feet out a long way, the feet can remain more securely screwed into the machine, while the height adjustment is handled by adding 1 mm spacer discs into the printed cup.
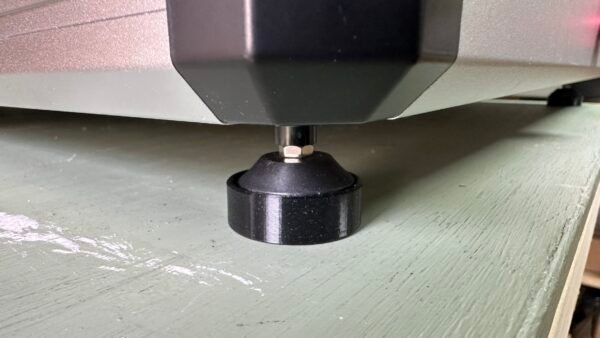
How the Levelling Cups Work
Each printed cup sits under one of the machine’s original feet. The cup has a recess that holds the foot in position, and the 1 mm levelling discs are placed inside the bottom of the cup.
The machine foot then sits on top of the discs, inside the remaining space of the cup.
This means each corner can be raised in controlled 1 mm steps without relying on excessive adjustment of the threaded foot.
The basic arrangement is:
Bench surface
↓
TPU levelling cup
↓
1 mm spacer discs
↓
Original TTC450 Ultra machine foot
↓
Machine frame
Instead of making the foot longer, the whole foot is lifted by a known amount.
Why TPU Is a Good Material for This
I printed the cups in TPU 95. That turned out to be a good choice because TPU has a slightly grippy feel and is less slippery than hard plastic.
That gives several advantages:
- The cups are less likely to slide around on the bench.
- The machine feet sit more securely inside the cups.
- The TPU can absorb a small amount of vibration.
- The cups are less likely to mark the surface they sit on.
- The slightly flexible material helps the cups sit nicely against the bench surface.
This is not meant to replace a rigid machine stand, but for a desktop CNC like the TTC450 Ultra, TPU is a very practical choice.
Why This Is Better Than Winding the Feet Out
The main benefit is stability.
With the original feet wound far out, the machine can end up supported on a longer exposed thread. That may work, but it is not ideal. The more thread that is exposed, the more the foot can feel like it is hanging below the machine rather than being firmly supported.
With the levelling cups, the original feet can stay wound in much closer to the machine. The height correction is done underneath the foot using the spacer discs.
This gives a neater setup and makes the machine feel more planted.
The spacer discs also make the adjustment more repeatable. Because each disc is 1 mm thick, it is easy to know how much each corner has been raised. If the machine is moved, the same setup can be recreated by recording how many discs were used at each foot.
For example:
Front left: 2 discs
Front right: 1 disc
Rear left: 3 discs
Rear right: 2 discs
That is much easier to repeat than trying to remember how many turns each foot was wound out.
Print Requirements
For the full setup, print:
- 4 levelling cups
- As many 1 mm spacer discs as needed
I recommend printing more discs than you think you will need. They are small, quick to print, and useful for fine adjustment.
A good starting point would be:
4 cups
12 to 20 spacer discs
That gives enough adjustment for most benches or slightly uneven surfaces.
How to Level the TTC450 Ultra Using the Cups
I found it much easier to level the machine in two stages rather than trying to correct all four corners in one go.
Start by levelling the machine front to back. Once that direction is correct, level it left to right.
Trying to get all four corners perfect at the same time can become frustrating, because changing one corner affects the others. Working in one direction first makes the process much easier.
Step-by-Step Levelling Method
- Place the TTC450 Ultra on the bench where it will normally be used.
- Put a level on the machine frame in the front-to-back direction.
- Check which end needs to be raised.
- Place a levelling cup onto the machine foot and temporarily place spacer discs underneath the cup, between the cup and the benchtop.
- This lets you test how many discs are needed without repeatedly lifting the machine foot and putting discs inside the cup.
- Once you know how many discs are needed, remove the cup, place those discs inside it, and then put the cup back under the foot.
- Repeat this until the machine is level front to back.
- Next, place the level across the machine from left to right.
- Repeat the same process, adding spacer discs where needed until the machine is level across the width.
- Once both directions are correct, check the machine again front to back and left to right.
- Make any small final adjustments if needed.
- Finally, check that all four feet are sitting firmly in their cups and that the machine does not rock.
My Preferred Method
The easiest method I found was:
- Place the cup on the machine foot.
- Add loose spacer discs between the cup and the bench to test the height.
- Check the level.
- When correct, remove the cup.
- Put the spacer discs inside the cup.
- Place the cup back under the foot.
This method is quicker than lifting the machine corner every time you want to try a different number of discs.
It also makes it easier to experiment with the height before committing to the final arrangement.
Using the Spacer Discs
The spacer discs are designed to give simple 1 mm height changes. That is accurate enough for this type of levelling and makes the adjustment easy to understand.
For example:
1 disc = raise that foot by 1 mm
2 discs = raise that foot by 2 mm
3 discs = raise that foot by 3 mm
The discs sit inside the cup, and the machine foot sits on top of them.
Once fitted, the discs are hidden inside the cup, so the finished setup looks neat and tidy.
Practical Benefits
This upgrade has several practical benefits:
- The machine sits more securely.
- The original feet do not need to be wound out excessively.
- The cups help stop the machine feet sliding on the bench.
- The TPU material gives a grippy, stable base.
- The 1 mm discs make levelling simple and repeatable.
- The setup looks tidier than long exposed foot threads.
- The machine feels better supported.
It also makes the levelling process less frustrating. Instead of trying to fine-tune several adjustable feet at once, you can build up the height in known steps.
Important Note About Machine Accuracy
These cups are designed to help the machine sit level and stable on the bench. They are not a replacement for surfacing a spoilboard or checking that the machine is mechanically square.
For CNC work, the waste board or spoilboard should still be surfaced after fitting if you need the cutting surface to be perfectly parallel to the machine’s movement.
Levelling the machine helps with setup and stability, but surfacing the spoilboard is what makes the cutting surface match the travel of the cutter.
The ideal setup is:
- Level and stabilise the machine using the cups.
- Fit the waste board.
- Surface the waste board with the CNC.
- Use the surfaced board as the true machining reference.
Why I Think This Is a Must-Have Addition
This is one of those small printed upgrades that makes the TTC450 Ultra feel more complete.
It is not complicated, but it solves a real setup problem. The machine feet remain properly supported, the CNC sits more securely on the bench, and the levelling process becomes more controlled.
The TPU cups also give the machine a more planted feel, especially compared with having feet wound out on long exposed threads.
For anyone setting up a TTC450 Ultra on a bench that is not perfectly flat, these levelling cups are a very useful addition. They are quick to print, simple to use, and make the machine easier to set up properly.
Final Thoughts
I designed these levelling cups because I wanted a cleaner, more stable way to level my TTC450 Ultra without relying on over-extended adjustable feet.
The result is a simple TPU cup and spacer system that works well, looks tidy, and makes levelling the machine much easier.
Print four cups, print a selection of 1 mm discs, and use them to bring the machine level one direction at a time. Once fitted, the machine feels better supported and more secure on the bench.
For me, this is a small but worthwhile upgrade and one I would recommend printing as part of the initial TTC450 Ultra setup.