
3D-Printed Z-Probe Caddy for the TwoTrees TTC450 Ultra
One of the first small upgrades I wanted to make for my TwoTrees TTC450 Ultra CNC was a proper storage caddy for the Z-probe. It is a very simple accessory, but after using the machine for a while it became obvious that the probe needed a permanent home.
The Z-probe is one of those parts that is easy to overlook. It is only used for setting the Z height, but it is an important part of the CNC workflow. If it is left loose, unplugged, or stored away from the machine, it becomes another small item to find before starting a job. Worse still, the cable can get tangled, the crocodile clip can catch on something, or the probe plate can end up sitting somewhere it should not be.
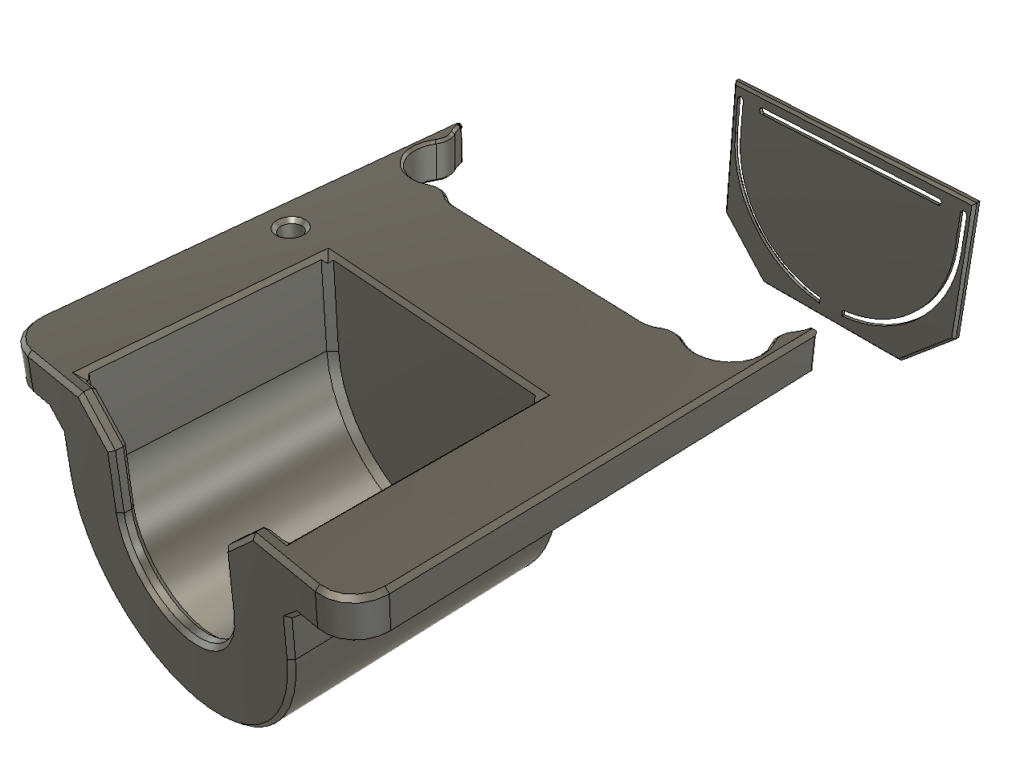
So I designed and 3D-printed a dedicated Z-probe caddy that mounts directly to the Z-axis assembly of the TTC450 Ultra.
This keeps the probe plate, cable, and crocodile clip stored neatly on the machine, ready to use whenever I need to set Z-zero.
Why I Made It
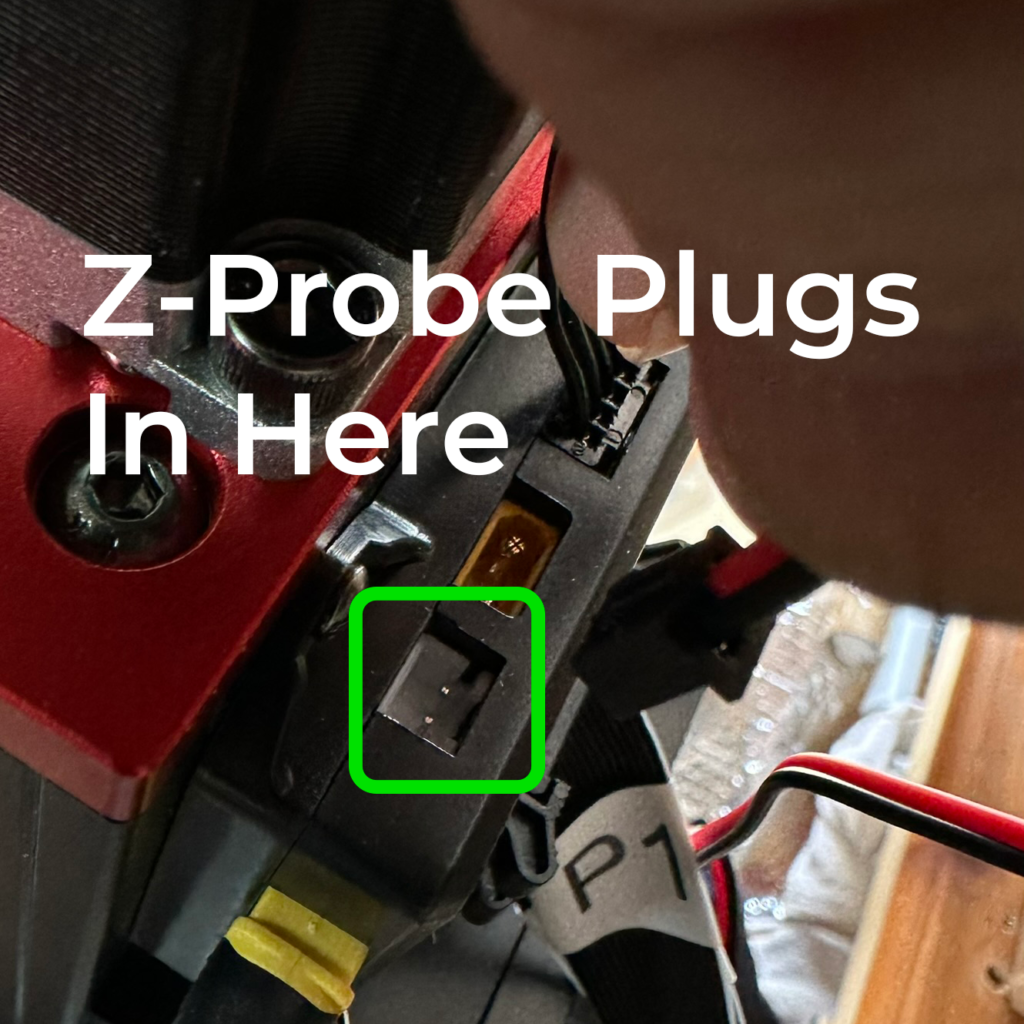
The TTC450 Ultra has a probe socket on the Z-axis assembly, but once the machine is built, that socket is not especially easy to access. It is tucked away behind the Z carriage area, which makes plugging and unplugging the probe a bit awkward.
Rather than keep connecting and disconnecting the probe cable, I wanted to leave it plugged in permanently.
That makes sense for a few reasons.
Firstly, it avoids unnecessary wear on the small probe plug and socket. These small connectors are not something I want to be plugging in and out every time I use the machine. Over time, repeated use can loosen the fit, stress the wires, or damage the socket. Leaving the probe plugged in reduces that risk.
Secondly, the probe is always ready to use. When I need to set the Z height, I simply lift the probe out of the caddy, place it on the workpiece, clip the crocodile clip to the cutter, and run the probe routine. When I have finished, everything goes straight back into the holder.
Thirdly, it keeps the machine tidier. Loose probe cables around a CNC machine are not ideal. The caddy gives the probe cable and clip a controlled storage position, away from the cutter, spindle, moving parts, and work area.
For me, this makes the caddy a must-have addition. It is a small print, but it improves the way the machine is used every time.
The Main Benefits
The biggest benefit is convenience. The probe is stored exactly where it is needed, directly on the machine. There is no searching for the probe plate, no untangling the cable, and no reaching behind the Z carriage to plug it in.
It also protects the probe connector. Because the lead can remain plugged into the machine, there is far less mechanical wear on the plug and socket. This is especially useful on the TTC450 Ultra because the probe connector is not in the most accessible position once the machine is assembled.
The caddy also improves cable management. The cable can be looped neatly into the holder instead of hanging loose around the Z-axis. That reduces the chance of it catching on the spindle, drag chain, clamps, material, or cutter.
Another advantage is safety and reliability. The probe plate and crocodile clip have defined storage positions, so they are less likely to accidentally touch each other or touch the cutter when not in use. An accidental touch would not normally damage the controller, because the probe input is only a low-current sensing circuit, but it could cause a false probe trigger or simply create unnecessary confusion.
By keeping everything properly parked, the probe setup becomes cleaner, safer, and more reliable.
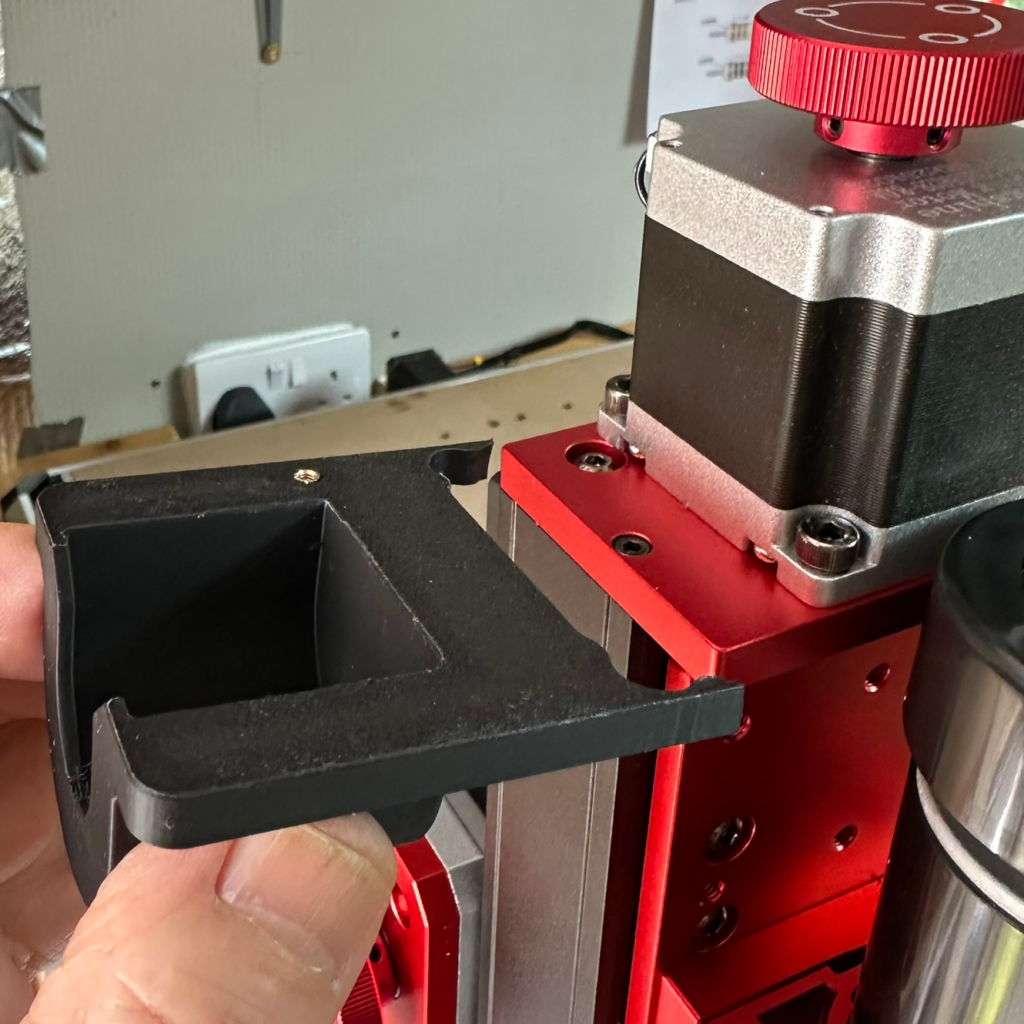
Designed to Mount on Either Side
The caddy is designed so it can be mounted on either side of the Z-axis assembly. This gives flexibility depending on how the cable is routed and which side of the machine is easiest to access.
On my machine, I wanted it close enough to the Z-probe socket that the lead could remain connected, but positioned so the caddy did not interfere with the movement of the Z-axis, the spindle, or the working area.
The caddy is held against the Z-axis assembly using a 3M adhesive patch. I added a stencil feature to help mark the correct adhesive area on the inside face of the caddy. The adhesive patch sits between the inside face of the caddy and the Z-axis assembly, holding it firmly in place.
This makes the installation neat and avoids drilling into the machine.
Probe Plate Orientation
One important detail in the design is the orientation of the probe plate when stored.
I wanted the metal probe surface to be kept away from the crocodile clip. The probe plate is stored so that the plastic/non-conductive side faces towards the clip area. That way, even if the clip moves slightly inside the caddy, it is much more likely to touch plastic rather than the metal probe surface.
This reduces the chance of the crocodile clip accidentally contacting the metal probe plate while the probe is parked.
The probe is still connected to the machine, but because the metal plate and clip are kept separated, it remains safely stored and ready for use.
Crocodile Clip Parking Point
I also added a dedicated parking point for the crocodile clip.
The caddy includes a hole for a 2.5 mm heat-set insert. A 2.5 mm bolt can then be fitted into the insert and locked in place. This creates a small metal post that the crocodile clip can grip when it is not being used.
This is much better than leaving the clip loose.
The parked bolt gives the clip a proper home, keeps it under control, and stops it from rattling around in the caddy. It is also positioned on the opposite side of the caddy from the probe plate, so even if the clip moves slightly, it can only contact the plastic body of the caddy rather than the metal probe surface.
This was a simple design feature, but it makes the finished holder much more practical.
Leaving the Probe Plugged In
The caddy was designed around the idea of leaving the Z-probe plugged in all the time.
On a typical GRBL-style CNC controller, the probe is just a simple contact circuit. The controller watches for the circuit to close when the cutter touches the probe plate. It is not powering the probe in the way a motor or sensor module would be powered. It is normally just a low-current input signal.
That means leaving the probe plugged in is generally fine, provided the probe plate and clip are stored safely and cannot accidentally touch the cutter, spindle, or each other.
The important points are:
The probe plate should be stored securely.
The crocodile clip should have a proper parked position.
The cable should not be able to fall into the cutting area.
There should be enough slack for the Z-axis movement.
The cable should not catch on the spindle, clamps, workpiece, or drag chain.
The caddy solves these problems by giving every part of the probe a proper place.
Why This Is Better Than Loose Storage
Without a holder, the Z-probe usually ends up in one of three places: loose on the bench, unplugged in a drawer, or dangling from the machine. None of those are ideal.
If it is on the bench, it can get buried under tools, offcuts, clamps, or dust. If it is unplugged, the small connector has to be handled every time the probe is needed. If it is dangling from the machine, it risks catching on something or being pulled into the work area.
The caddy avoids all of that.
The probe stays with the machine. The plug stays connected. The plate is protected. The clip is parked. The cable is controlled. Everything is ready before the job starts.
For a CNC machine, small improvements like this make a big difference. The less time spent finding accessories and sorting cables, the more enjoyable the machine is to use.
How I Use It
My normal workflow is now very simple.
Before starting a job, the probe is already plugged into the TTC450 Ultra and stored in the caddy.
When I need to set the Z-zero point, I remove the probe plate from the holder, place it on top of the workpiece, attach the crocodile clip to the cutter, and run the Z-probe routine.
Once the probing is complete, I remove the clip, return the probe plate to the caddy, park the crocodile clip on the small bolt, and make sure the cable is safely tucked away.
The machine is then ready to run.
It makes probing feel like a built-in part of the machine rather than an accessory that has to be found and connected each time.
Print and Installation Notes
The caddy can be printed as a normal functional part. I designed it to be practical rather than decorative, with enough strength to hold the probe securely while keeping the design compact.
The adhesive face should be clean before fitting. I recommend cleaning both the caddy and the mounting area on the Z-axis assembly before applying the 3M adhesive patch.
If using the crocodile clip parking feature, fit the 2.5 mm heat-set insert carefully and then install a 2.5 mm bolt into it. The bolt should be fixed securely so it does not work loose with vibration.
Before running the machine, check that the caddy, cable, probe plate, and clip do not interfere with the full movement of the Z-axis.
Also check that the cable cannot reach the cutter or get trapped during movement.
A Small Upgrade That Feels Like It Should Have Been There From the Start
This is one of those simple 3D-printed workshop upgrades that makes the machine feel more complete.
It does not change the cutting performance of the TTC450 Ultra, but it improves the everyday workflow. The probe is always available, the connector is protected from repeated wear, and the machine looks neater and more organised.
For me, this is now a must-have addition to the machine. It keeps an important accessory exactly where it belongs and removes one small annoyance from every CNC setup.
I will be linking the STL file below for anyone who wants to print one for their own TTC450 Ultra.