
Retiring Early, Making More, and Starting My CNC Milling Journey
By Mike Edmonston
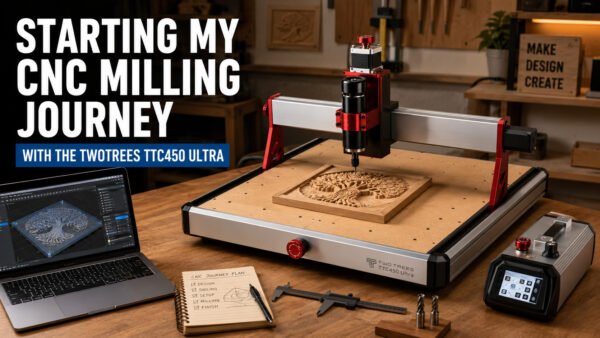
Starting My CNC Milling Journey with the TwoTrees TTC450 Ultra
One of the first hobbies I want to properly explore is CNC milling. I have been interested in CNC for a long time because it combines so many things I enjoy: design, engineering, software, materials, accuracy, problem solving and creativity.
Now that I have more time to focus on personal projects, I have decided to start properly with a CNC router and learn the process from the ground up. The machine I have chosen is the TwoTrees TTC450 Ultra, and this post marks the beginning of that journey.
This is not intended to be a polished “expert review” from someone who already knows everything about CNC milling. It is the start of a real hobby journey: setting up the machine, understanding the workflow, learning the software, choosing cutters, making mistakes, improving the setup and gradually building confidence.
Why I Chose the TwoTrees TTC450 Ultra
For a hobby user, the TwoTrees TTC450 Ultra looks like a very capable starting point. It offers a useful working area, a solid platform for learning and enough capability to produce real parts, signs, plaques, craft items and test pieces without jumping straight into industrial-level equipment.
My plan is to begin with the machine as supplied. Before modifying or upgrading anything, I want to understand how it performs in standard form. That means learning the basics properly first: feeds and speeds, cutters, materials, workholding, dust control, toolpaths and safe operation.
It is very easy with a hobby like CNC to start upgrading parts before you have even made your first proper cut. I want to avoid that as much as possible. The sensible approach is to get the machine assembled, checked, squared, tested and then used on simple projects before deciding what really needs improving.
Getting the Workshop Ready
Before the first proper project can begin, there is a lot to organise. CNC milling is not just about the machine itself. The surrounding setup matters just as much.
Some of the early jobs include preparing a suitable bench, thinking about dust extraction, sorting out clamping, choosing starter cutters and deciding what materials to practise on. I also want to make sure I have a clear workflow from design to finished part, rather than just rushing into cutting something too complicated.
The first stage will be simple test pieces. These will help me learn how the machine behaves and how different settings affect the final result. I expect to start with softwood, MDF or plywood before moving on to better timber and more decorative pieces.
Learning the Basics First
My first goal is not to produce complicated carved panels or perfect inlays. It is to understand the fundamentals.
The early projects will probably include simple profile cuts, pocket cuts, drilled holes, v-carved lettering and basic signs. These may not be exciting finished products at first, but they are essential for learning.
I want to understand what a clean cut looks and sounds like. I want to learn how deep to cut, how fast to move, how different bits behave and how important clamping really is. I also want to learn what happens when the settings are wrong, because that is often where the most useful lessons come from.
The Software Side: VCarve Desktop
The CNC machine is only one part of the process. The software is just as important, because it is where the design becomes a set of toolpaths that the machine can actually follow.
After looking at different options, VCarve Desktop stood out to me as a very good starting point for the type of CNC work I want to do.
You can find it here:
https://www.vectric.com/products/vcarve
What appeals to me about VCarve Desktop is that it feels approachable. The workflow makes sense: set up the job size, create or import the design, choose the tools, calculate the toolpaths, preview the result and then output the file for machining.
For someone getting started, that visual workflow is very important. Being able to preview the cut before sending anything to the CNC router should help avoid mistakes and build confidence.
Why VCarve Desktop Looks Like a Good Fit
One of the things I like about VCarve Desktop is that it does not feel like software designed only for engineers. It is visual, practical and focused on making things. For the sort of work I want to produce, such as signs, plaques, lettering, craft pieces and eventually inlays, it looks like a strong fit.
There are free and lower-cost software options available, and I may still experiment with some of them. However, some software can feel more technical, less polished or more difficult to understand when you are just trying to get started.
For me, the appeal of VCarve Desktop is that it should let me spend more time learning CNC and making projects, rather than fighting with complicated software menus. It is not the cheapest option, but it appears to offer a good balance between usability, capability and value for money.
Starting Simple Before Moving On
My plan is to begin with simple, controlled projects. I want to build skills gradually rather than trying to jump straight into advanced work.
The first jobs will probably include:
- Basic profile cuts
- Simple pocketing tests
- V-carved lettering
- Small signs and plaques
- Material and cutter test pieces
- Simple jigs and workshop aids
Once I am more comfortable, I would like to move on to more decorative work. Inlays are something I am especially interested in, but I want to understand the basics first. Accurate inlays need good toolpath setup, reliable cutting, suitable timber and a clear understanding of how the software handles the male and female parts of the design.
Future Possibilities
As I gain confidence, I would also like to explore relief carving and more detailed decorative work. This is where CNC becomes especially interesting creatively. Textured panels, raised designs, carved artwork and more advanced craft pieces all become possible once the basic skills are in place.
VCarve Desktop looks like a sensible place to start, and if I eventually need more advanced features there is a natural upgrade path within the Vectric range. That makes the starting point feel less risky, because I can begin at a sensible level and only move up when I genuinely need to.
Combining CNC with Other Hobbies
One of the things I enjoy most is combining different skills. CNC milling will not sit on its own. It will naturally connect with CAD design, 3D printing, electronics, photography, workshop organisation and general problem solving.
A CNC project might need a 3D printed jig, a custom dust shoe, a CAD-designed bracket, a wiring improvement, a finishing process or a better way to hold the material. That crossover between tools and techniques is exactly what makes the hobby interesting to me.
I expect some projects to be practical, some decorative and some simply experimental. Not everything will work first time, but that is part of the process.
What I Will Be Sharing
As I get started with the TwoTrees TTC450 Ultra, I will document the process honestly. I want to share what works, what causes problems, what I would do differently and what I learn along the way.
Future posts may cover machine setup, first test cuts, cutter choices, dust control, VCarve Desktop workflows, simple projects, mistakes, upgrades and finished pieces.
The aim is not to pretend that everything is perfect. The aim is to show the real process of starting a new hobby, learning the tools and gradually improving.
The Start of the Journey
The TwoTrees TTC450 Ultra will be my starting point for CNC milling, and VCarve Desktop looks like the software that will help make the process enjoyable and approachable.
This is where the journey begins: setting up the machine, learning the workflow, making the first cuts and seeing what I can create.
There will no doubt be mistakes, experiments, upgrades and changes of plan along the way, but that is part of the fun. I am looking forward to learning the process properly and sharing the results as the hobby develops.
Take a look at the TTC450 Ultra here: TwoTrees.com
2 responses to “CNC Milling”
Thanks for your kind words, Mont! I’m excited to share the journey and all the learning along the way. Stay tuned for updates as I dive deeper into CNC milling and explore new projects. If you have any questions or want to share your own experiences, feel free to jump in anytime!
Congrats on your retirement. Look forward to your updates.